Downgrade/Unlock Dell Laptop BIOS (e6400/d630 series)

Sometimes it can be useful to downgrade the BIOS of a device. We’ve found that by downgrading the BIOS on laptops we can change the unlock code used to bypass BIOS lock codes. Most of the schools we work with receive donated equipment so being able to unlock the BIOS becomes imperative, especially during the imaging process. We’ve outlined the steps below to both downgrade the BIOS on an older Dell laptop, as well as include instructions as to unlocking a previously secured BIOS.


Step 1 – Create a Bootable Flash Drive


This process details creating a bootable USB flash drive that includes Hiren’s BootCD. If you’re unfamiliar with Hiren’s it is a great compilation of many tech tools that can be useful for diagnosing and fixing computers. Best of all it’s free, like much of the software we recommend. You’ll need the latest version of the software so you can download that here:

Download the latest Hiren’s BootCD

Once you have a copy of the .iso for Hiren’s you’ll need to follow and download a few more tools before you can boot from a flash device. As those steps have been carefully documented already, please follow this link to complete the process of creating a bootable Hiren’s flash drive:

How to create a bootable Hiren’s flash drive


Step 2 – Locate and load a compatible BIOS firmware


As we’re downgrading the BIOS version on a laptop it can sometimes be challenging to locate old firmware. Luckily for us Dell has their FTP publically accessible hence we can access almost any previous version of BIOS that we’ll need for the next step. Please browse to the following website in a FTP-compatible browser in order to locate the appropriate firmware. In my example I have connected to the website, entered the bios folder, and scrolled to located my specific BIOS version. Sometimes you may have to try a few versions before locating a correct one.
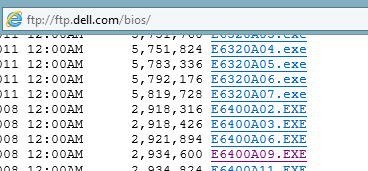


Dell Public FTP Repository

Once you’ve located a version and have downloaded it load the executable (.exe) onto the Hiren’s boot flash you previously created.


Step 3 – Boot and Flash


At this point you should have both a Hiren’s boot usb and a copy of a downgraded BIOS you intend to flash your device with. Reboot your Dell and press F12 to access the boot menu. Select the USB device you created and load Hiren’s. You’re prompted to select which Hiren’s tool you’d like to use and for this tutorial we’ll be using Mini Windows XP.

Once Mini Windows XP has loaded on your device, you must select the command prompt from the desktop to access the shell. At the command prompt shell you should type c: to access the flash device. If needed, you can also perform a dir to view all files on the flash device. Locate the Dell BIOS firmware you intend to flash and type it with the following /forceit flag:

e6400

At this point the BIOS upgrade launcher should load and it will inform you that BIOS downgrades are not recommended. Agree past all of the update screens and although the launcher states it will automatically reboot you will manually have to type exit to exit the shell and click the start menu to reboot the computer. Once rebooted the Dell BIOS update screen should appear and your BIOS should be downgraded. Be sure not to disconnect power or touch the device during the BIOS update for risk of ‘bricking’ the laptop.


Step 4 – Unlock the BIOS


At this final step you should have successfully downgraded your BIOS version in order to change the BIOS unlock code. Once you enter the BIOS and select the Unlock option you’ll be presented with a similar screen:
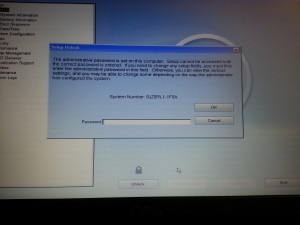
If your system number still contains a [1D3B, 1F5A, 3A5B, or 1F66] then you will need to downgrade to a different BIOS version before you will be able to unlock the device. If your system number ends in a different alphanumeric key then you can continue. For this step you can download the offline tool and keep a local copy or use the following BIOS Master Password Generator website. Please make sure to type your system number all in CAPS and include the exact spelling with hyphens. An example of a successfully generated key can be found here:
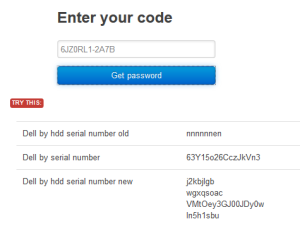
As you can see a long password is generated (dell by serial number) which should be entered to unlock the BIOS of your Dell laptop. Please make sure to enter the password exactly as listed paying close attention to the difference between a letter l and the number 1.

The BIOS Password unlocker website and downloadable tool can be found below. As always, if you have trouble with these steps please don’t hesitate to contact us for support. Good luck and get cracking!


BIOS Master Password Generator for Laptops

Dell Master BIOS Decompiler

ClearOS Dansguardian accessdenied.php Bypass Script

Using Dansguardian on ClearOS, ClarkConnect, or any basic *unix setup, you can configure a .php script to bypass the content filtering software for a set amount of time using a defined username and password. This walkthrough involves the modification of configuration files and general *unix knowledge. If you need additional assistance please don’t hesitate to contact us via email or phone.


This walkthrough requires a fully configured content filter utilizing Dansguardian or Dansguardian-AV utilizing a transparent proxy!

We need to first log into our server via console or SSH. Once logged in we need to locate the first file to edit called dansguardian.conf

To locate the file, as the location varies, I prefer to use the universal *unix find command-


In the case above, the file is located in the /etc/dansguardian-av/ directory. To edit the file, you can use your favorite *unix text editor. In this case I am going to use nano as it’s fairly easy to use-


There are a few settings that must be configured correctly in this file for later us:

  • Set the reporting level to 1 or 2 depending on your needs
  • Point the accessdenied.php script to a file location in which we’ll create later
  • Enable the non-standard delimiter in order to allow dansguardian to correctly pass information to our script


Please note the in above image the ip-address reflects the location of your transparent proxy server.

Now we need to edit the dansguardianf1.conf file which is located in the same location:


There are additional settings we need to change here:

  • Change the temporary bypass denied page setting to -1 which configures dansguardian to use our script file
  • You must generate a md5 key that will be unique to our script (see link below)
  • Change reporting level to match setting in dansguardian.conf file


Follow this link to generate a MD5 Key: Generate MD5 Key

We now have to create our accessdenied.php script. This file is located in the transparent web-proxy public location. To locate it, we’ll use the find command again:


In the case above we notice the public directory resides in /var/webconfig/. Let’s create our accessdenied file in the public directory:


To access an example .pdf document outlining the accessdenied.php script, please click the link below:


An outline of some key settings are displayed below:


The last step is to create a text file containing a username and password used to bypass the filter. You need to place this file outside of the public www directory used by the transparent-proxy. In the following example I placed the file named access.txt a directory below the public www:

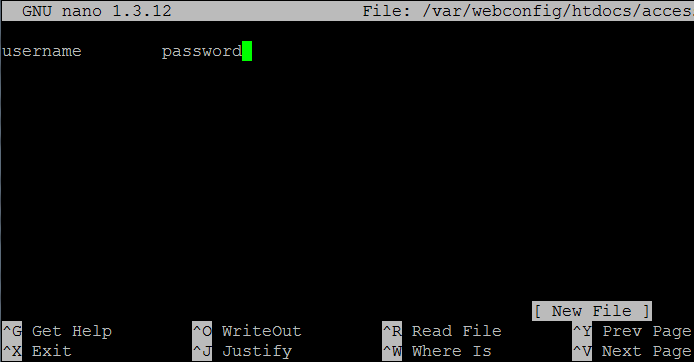
The file can contain a simple username and password separated by use of a tab or space:

Once done, save the file, restart the service, and your should be good to go!

Microsoft WorldWide Telescope

Many people have heard of using Google Earth to explore the world.  Well, Microsoft has had a software that allows you to explore the cosmos in much the same way.  It really is an amazing piece of software.  Below is an except from their website that gives you a brief overview of what the software is.  The direct link for the website and the Microsoft Windows Client are located at the end of the article.

“The WorldWide Telescope (WWT) is a environment that enables your computer to function as a virtual telescope—bringing together imagery from the world’s best ground- and space-based telescopes for the exploration of the universe. WWT blends terabytes of images, information, and stories from multiple sources into a seamless, immersive, rich media experience delivered over the Internet. Students of all ages will feel empowered to explore and understand the cosmos using WWT’s simple and powerful user interface.”

To visit the website for more information, or to access the web-client interface please follow this link: Microsoft WorldWide Telescope

To download the current version for Windows [version 2.8.15] please follow this link:

Smithsonian Wild

Researches at the Smithsonian have recently created a database comprised of over 201,000 pictures of normally elusive animals in their natural habitats.  The process was made possible by the use of motion-activated, automated cameras, spread around the world.  The gallery contains over 200 species of birds and mammals.

Click the link to check it out!

Smithsonian Wild

Arcademic Skill Builders

This is a fantastic website that we use for our K-5 instruction at WWA.  It allows the students to compete against one another in a variety of activities and challenges.  The website is kid-friendly, free of advertisement and best of all free to use!

The website was originally born as a side project in the research department of the University of Kansas School of Education with funding from a NSF grant.  The website began as the idea of Dr. Jerry Chaffin who believes that students in rate-based math practice would lead to higher fluency and automaticity.  The multi-player competition engages students and pushes them to achieve.

You can locate the website at Arcademic Skill Builders